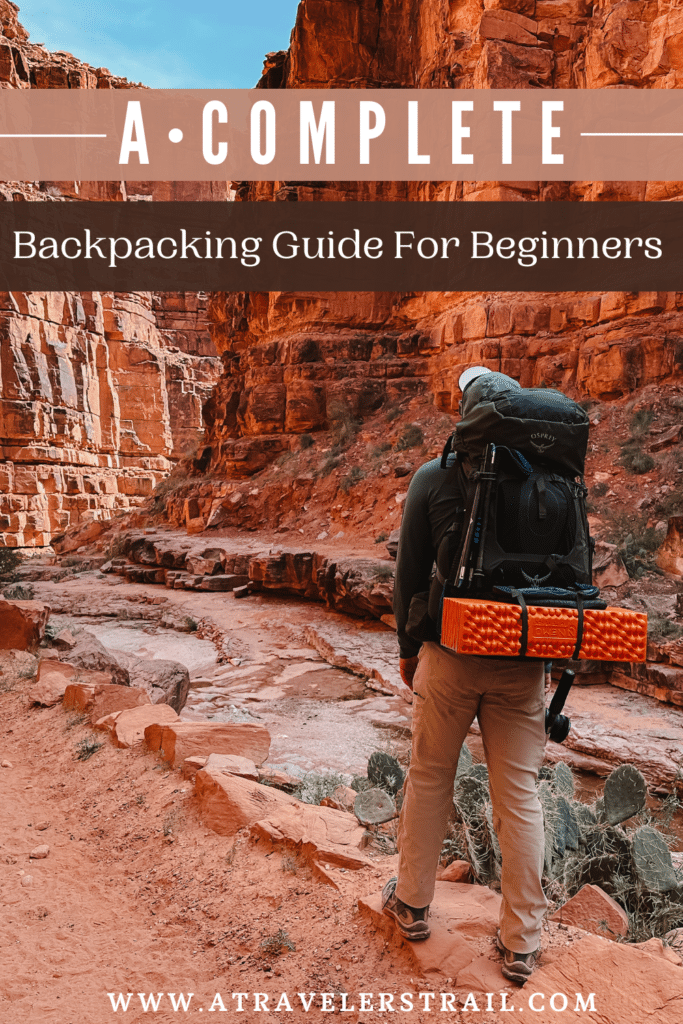
So you want to go backpacking? Here is everything you need to know, a complete backpacking guide for beginners.

Being in the backcountry is unlike any other experience or adventure you have done. It’s the perfect hobby for adventure seekers who love the great outdoors but need a bit more solitude and don’t mind a little hard work for some secluded and almost guaranteed epic views.
But I totally get it, it can get quite overwhelming when you first start researching. I know when I first started researching I instantly felt intimidated.
Between purchasing backpacking gear, researching trails, getting permits, safety and oh yeah, pooping in a cathole, we were both a little hesitant to pursue this new hobby.
Now fast forward 4 years later and I can honestly say backpacking is something that we will continue doing for years and years to come.
In this post we will go everything you need to know to get you started and ready for your first backpacking adventure.
This post is all about A Complete Backpacking Guide For Beginners.
This post may contain affiliate links, which means I’ll receive a small commission if you purchase through my links, at no extra cost to you. Please read full disclosure for more information. Thanks for your support!
Backpacking Guide For Beginners
Ready to disconnect and recharge that mental health of yours? The ultimate escape to nature starts NOW
1. Pick an Easy Destination


For your first trip keep it short and with minimal elevation gain. I can guarantee your first trip will come with an overly packed bag. Don’t worry we’ve all done it! So last thing you want is an overly strenuous hike that is going to have you regretting your decision to backpack.
We also recommend your first trip to be in the Summer season, this way you have a good chance of good weather and you have extended day light hours so you don’t feel rushed to get from site to site. With comfortable conditions you’re setting yourself up for success.
Try to pick a trail that’s well traveled and maintained. We love using All Trails to read reviews and also Reddit Forums. I swear by forums, they provide so much useful information.
I recommend having at least 3 backpacking trips under your belt before embarking on longer and more difficult trails. This will give you the needed time to get to know your gear and tinker out any kinks.
2. Purchase/Rent/Borrow Essential Gear

Okay so you don’t need to go out and buy the most expensive gear you can find. Should you invest in quality gear yes, but I recommend doing this after you know this is something you really love and are going to continue doing. Backpacking gear is quite expensive but just keep in mind you get what you pay for.
Just remember you’re going to be carrying everything you need to survive on you back, so be mindful of what you decide to take on trail.
TEST YOUR GEAR AT HOME! This will give you so much peace of mind when you get to camp after hiking for hours and are tired and want to rest. Nothing is worse than trying to figure out how to pitch a tent at the end of a long hiking day.
You will hear this over and over from any outdoor enthusiast, always carry The Ten Essentials! Even on day hikes.
THE TEN ESSENTIALS:
- Navigation (map, compass, altimeter, GPS device)
- Headlamp with extra batteries
- Sun Protection (sunscreen, hat, sunglasses, sun protective clothes)
- First Aid Kit
- Knife
- Fire (waterproof matches, lighter, stove)
- Shelter (emergency blanket/tarp)
- Extra Food
- Extra Water (always bring a backup water purifier)
- Extra Clothes
Backpacking Gear List
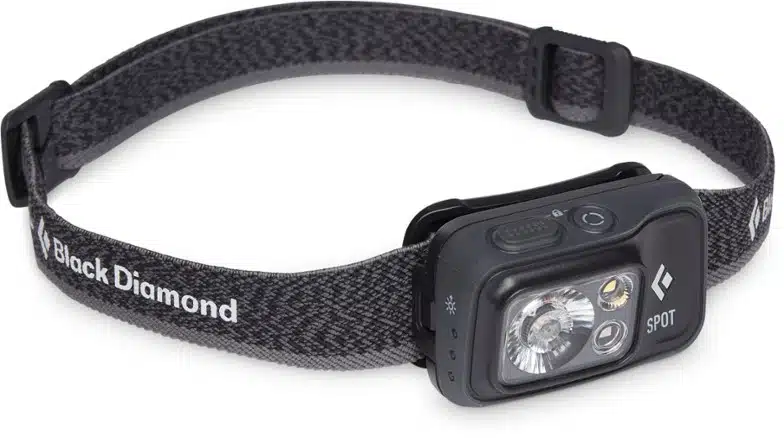
Headlamp
I recommend a headlamp over a lantern. For one thing you want to be hands free when setting camp or for cooking. A lantern works too but headlamps tend to work better around camp and when trekking in low light situations.
I carry a small lantern as well but that is used mostly for inside my tent.
Backpack
The first thing you should do before ordering your pack is go into REI or somewhere similar to get properly fitted. It’s important to have the right size backpack because it can significantly help or hinder your hike.
I would recommend a bag between 50-85 liters for multi day hikes. All four of these bags come with a rain cover but if yours doesn’t come with one I recommend purchasing one.
We try and keep the overall weight of our bags between 30-40 pounds max. As a rule of thumb your bag should not weigh more than 20 percent of your body weight.


3 Season backpacking tent
Backing gear can be expensive but a quality tent is one of the items I highly recommend investing in. You want a tent that is not only durable but lightweight.
We have the Big Agnes UL3 which is technically for 3 people but we really enjoy having the extra room. We are very happy with our purchase, It’s easy to set up, it’s comfortable, it’s never musty inside, and most importantly, extremely lightweight.


Backpacking SLeeping PAd
Finding the right sleeping pad can be quite the challenge. However fortunately for you we’ve tried a few and have listed a couple of great options.
Our recent setup is the Klymit V Insulated Sleeping Pad with the Nemo Switchback Pad. Now some might say this is a little overkill but honestly for a good nights rest we are more than happy to carry a little extra weight.
For a budget friendly alternative try the Trail Scout Sleeping Pad, again this could also couple with the Nemo Pad for some added comfort.


Sleeping BAg
When looking for the right sleeping bag, weight and temperature ratings are the main determining factor for your purchase. You want a lightweight bag without compromising warmth.
When considering temperature ratings know that you could always unzip your bag like we do in the summer months and use it as a blanket to stay cool. It’s a much easier option than being cold when temperatures fall and having to layer up.
We have the Apache and Badger bags by Western Mountaineering and of all of our purchases this is the purchase we are most happiest with. We love our sleeping bags so much.


Water filter system
We use the Katadyn water filter for a couple reasons. One; it snaps right into our water bladder, two, it can be hung and lastly, it can filter 3 liters of waters in under a minute in a half.
Above all it’s easy to store and takes up very little space in our bag. We also like to carry purification tablets as a backup.
The Sawyer Squeeze is also easy to use, dependable and lightweight , all these options are solid choices.


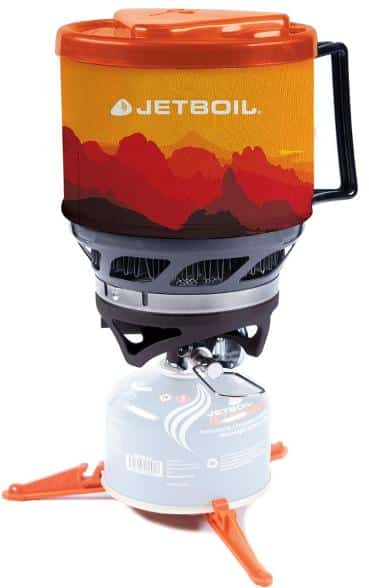
backpacking stove
The JetBoil MiniMo is the stove we use and love. It boils water quickly, it’s easy to use, excellent simmer control, light, compact and saves us from carrying bowls. One of us usually eats right out of the cooking cup and the other the bottom lid that covers the burner.
The Flash cooking system also gets fabulous reviews.

backpacking kitchen essentials
Just because I’m in the backcountry doesn’t mean I’m not drinking coffee. Coffee is an absolute must for me and honestly sipping my morning coffee in the backcountry is something I always look forward to. The GSI mug has a spill-resistant top and sealable spout to prevent heat loss.
Okay I can not recommend this lightweight spork enough! You will only need to bring this one utensil on your trip because it can be used as a spoon and fork. In addition the spork is tall enough to scoop food right out of dehydrated meal packets or tuna packets without getting your hands and fingers all dirty.
Don’t forget your fuel!


tip: bring a lighter as well, just in case of winds or elevation and your jet boil push-button igniter might not work.
Essential Backpacking Clothing
Don’t hike with cotton clothes, that is my number one tip when backpacking. It retains moisture, takes forever to dry, doesn’t insulate when moist, which feels uncomfortable and can even potentially lead to hypothermia.
Invest in wool or synthetic clothing for its quick drying, moisture wicking as well as temperature regulating capabilities.
Layering is going to be key to a comfortable backpacking trip. Layers allow you to easily adapt to weather changes. It’s essential to always pack a hiking layer (moisture-wicking synthetic materials or merino wool), an insulating layer (down or fleece), and a waterproof layer.
tip: bring a base layer set just for sleeping. It’s so nice to change into clean clothes at camp. You will sleep so much better I promise.
For a full list of clothing needs for backpacking read the following:
tip: Check out REI’s returned items section and second hand stores for discounted backpacking gear.
Also, if you aren’t already, I recommend purchasing the one-time $30 lifetime membership at REI Co-op. This gives you access to member only coupons, discounts, gear, free shipping, 10% back on eligible purchases and more.
3. Prepare for your Backpacking Trip

It’s important to be both physically and mentally prepared for backpacking.
Being able to comfortably hike at least 7 miles is a great start. Keep building up your endurance by hiking at least once a week in the month leading up to your trip.
Carry a day bag with water, snacks, lunch and some layers to mimic a bit of weight. Build your confidence with a few camping trips as well. This is the perfect opportunity to get to know your gear and work out any kinks. Between hiking and camping you will feel much more prepared for your backpacking trip.
Make sure to research your trail in advance. You need to know the logistics of the trail and trailstarts, permit needs, food storage requirements, water resources, camping regulations and parking.
It’s also so important to know what wildlife you might encounter on trail. Is bear spray needed? What about a bear canister for food? Critters bag? All important answers you should have before heading out.
Don’t forget to check the weather and park alerts before starting your hike. Unexpected changes happen quickly, floods, mudslides, fires, etc, which can lead to dangerous and unnecessary predicaments.
And don’t forget to always leave a detailed plan of your trip with a family or friend, make sure to include your estimated call time.
4. How to Pack your Backpack

First things first, GO GET FITTED. Don’t skip this. I promise a well fitted bag makes a world of a difference. I recommend REI.
Getting your gear to fit perfectly in your bag is going to take a couple of trips to figure out. Even us with 4 years of backpacking experience we still always mess around with the logistics of our pack. It’s pretty personal but in general you’ll want to pack your bulky items at the bottom.
There is usually a separate compartment for your sleeping bag and then in your main compartment follow with your tent, sleeping pad and extra clothing.
The heaviest of your items being in the middle like bear canister, food and stove. At the top leave items that you might want quick access to, like your water filter, bathroom kit and jacket.
Small items like snacks, lunch, headlamp, first aid kit, utility knife go into the lid. The hip pockets usually carry items such as chapstick, hand sanitizer, permits, compass.
As a rule of thumb your bag should not weigh more than 20 percent of your body weight. Just know it’s going to take a couple tries to get this right.
tip: Have frequent access to a water source? I recommend saving some weight here. Water weighs 2.2lbs per liter. For instance in you have a 3L bladder maybe do 1.5L instead.
5. How Much Food to Bring Backpacking


So this is highly dependent on the intensity of the hike, your size and weight and of course the length of the hike.
There is no definitive answer but as a rule of thumb you can figure on eating 1½ to 2½ lbs of food (or 2,500 to 4,500 calories) per person per day. Plan for breakfast, lunch, dinner and snacks.
Once you get a couple backpacking trips under your belt you will get a better understanding of your nutritional needs. Just make sure to pack a little extra in case of an emergency.
For backpacking meals ideas and how to properly store your food, read the following:
tip: make sure to write down your meal plan on paper or a spreadsheet, it helps visualize how much food you’ll actually need and it’s also great to bring along when grocery shopping.
6. Backpacking Hygiene
We always get asked about showering and feeling clean while backpacking. A lot of people say they would love to explore more of the outdoors but not being able to shower and change clothes everyday is really hard for them. I PROMISE it’s not that bad.
The views, the peace and happiness you get from being out in nature will make you forget all about your greasy hair.
Here are a few things we do to keep clean.
- Toothbrush and Toothpaste/Tablets
- Small hairbrush, face wipes, wilderness wipes ( we use these when we go number two and for me Alejandra, to clean down there, at the end of each night)
- Epic Massive Wipes when no lake/river dipping is allowed
- Rinse off in the lake or river when available and if allowed
If there is a body of water you bet we’re jumping in, not only does this help your aching muscles but it makes you feel clean and refreshed. If for whatever reason we don’t have access to a body of water and we are in the backcountry for more than 3 days we also like to bring these massive EPIC Wipes. We usually do one wipe every 3 days.
tip: Ladies keep your hair braided, this helps keep your hair feeling cleaner longer.
7. Going to the Bathroom in the Backcountry
Sometimes you will find pit and compost toilets, when these are available please use them. Most of the time though you will be using a cathole for number two. In some instances a WAG BAG is required.
What’s a WAG BAG? It’s a bag you use to collect and carry human waste while out in the backcountry. Basically you poop in a bag filled with polymers and enzymes gels that help break down waste, it’s a leak proof and odor proof. Once out of the backcountry you can safely dispose of your bag in any trash receptacle.
Just make sure to check what the specific regulations are where you plan to backpack.
Going Number One: Always pee at least 200 feet from any water source such as lakes, rivers and streams.
Going Number Two: With your trowel, find a private area with loose, diggable soil at least 200 feet roughly 70 steps from water, trails and camp.
Your cathole is your personal, single-use toilet. It should be 6 to 8 inches deep and 4 inches wide. Pack out your toilet paper in a sealable bag. I like to use doggy bags.
Cover your poop with the dirt you removed from the cathole. Remember to keep your trowel from touching poop. It should only touch dirt.
Sanitize.
THE GEAR FOR YOUR REAR:
- Trowel
- Wipes
- Toilet Paper
- Doggy Bags
- Hand Sanitizer
- Bathroom Kit Bag
I put all my items for my bathroom kit inside a bag. Doggie bags with used toilet paper and wipes are tied up and also placed inside my bathroom kit bag.


If you don’t want to put together a bathroom kit you can get this one that has everything you need already put together for you.
We recently upgraded to this kit because of PACT Tabs, PACT Tabs, kills bacteria commonly found in poop that can harm waterways, wildlife and public health. It also breaks down poop faster and comes with wipes so I longer need to bring toilet paper or wipes.

For my ladies I can not recommend a menstrual cup or disc enough. To dispose you will do like you were if you were going number two. Just make a cat-hole, dispose, cover with dirt and sanitize. If you are using other sanitary products it has to be packed out.


FYI: Some areas, especially high traffic parks or trails do not allow cat-holes and instead must use a WAG BAG. Rangers will usually ask before allowing you on trail if you have a wag bag and some will even ask to show it before allowing you to start.
8. Backpacking Safety Considerations
- If you have any doubts at all when you arrive at the trailhead, consult a park ranger. They are full of helpful tips and knowledge.
- Try to go with a friend or family member for your first couple adventurers, bonus point if it’s a fellow backpacker.
- Always pack the 10 Essentials, we mentioned these at the very start of the blog.
- Make sure to customize you first aid kit to your needs.
- Always stay on trail, not only do you increase your chances of something happening but you also trample vegetation, disturb animals, cause erosion, and endanger hikers after you who might think it’s the right path.
- Remember to always pack anything scented, including your toiletries in your bear canister, Ursack or Opsak. Don’t bring any food or scented items into your tent.
- For peace of mind consider purchasing a Satellite Messenger. You can send updates to family from this device but most importantly send an SOS signal if needed.
9. Follow Leave No Trace Principles
If you love to be outdoors and I’m guessing you do, whether it’s hiking, backpacking, kayaking or camping please follow these guidelines. Leave No Trace Principles helps minimize our impact and aids in preserving our earth as much as possible. If you would like additional information please read this article The 7 Principles.
THE 7 PRINCIPLES:
- Plan Ahead & Prepare
- Travel & Camp on Durable Surfaces
- Dispose of Waste Properly
- Leave What You Find
- Minimize Campfire Impacts
- Respect Wildlife
- Be Considerate of Others
Remember to be patient with yourself, you will get the hang of things with practice. Take it one step at a time and go as slow as you need to. Enjoy the scenery, take pictures and take all the breaks you need.
Hope this guide helps you get outdoors, go make some memories!
That concludes this post, A Complete Backpacking Guide For Beginners.
BUT WAIT THERE’S MORE:
- Backpacking Meals You’ll Actually Want to Eat
- Backpacking Essentials That You Actually Need
- A Guide to Havasupai Falls Arizona
Travel Resources
Here you can find all the travel site links that we personally use and recommend.
CAMPSITES/CAMPGROUNDS We like to use a couple apps for last minute campsite bookings. Our favorites are HipCamp, The Dyrt and Campendium.
ACCOMMODATION: We find the best deals with BOOKING.COM. The more you book the better the perks like free breakfast with your stay, room upgrades and even higher discounted room rates.
CAR RENTALS: We have always used RentalCars.com and find them to have the best deals, customer service and selection of locations.
FLIGHTS: Our go to for looking up flights is SKYSCANNER, but we try to always book directly with the airline.
TOURS/EXCURSIONS: GET YOUR GUIDE and VIATOR are two very reputable sites with easy and hassle free bookings.
TRAVEL INSURANCE: It’s so important to travel with insurance and for this we use SafetyWing. We are currently using them for our 1 year trip.
TRANSPORTATION: For all our bus, ferry and train transfer needs in Asia we use 12go.asia.
LIKE THIS POST? PIN IT FOR LATER AND SHARE IT WITH OTHERS!


Leave a Reply